Showing posts with label Jive. Show all posts

Monday, September 3, 2012

Installing a Headless PostgreSQL Server, Step-by-Step

Introduction

It isn't necessary to install PostgreSQL with its GUI frontend.  It runs just fine without it and consumes a smaller footprint.  If you're comfortable using the command line interface, installing headless is the way to go.  In some environments, it may even be necessary.  This step-by-step procedure shows you how.  This step-by-step installs an older version of PostgreSQL, 8.4.8-1, but is applicable to all.  It will install the postgres8_4-x86_64 package group, which contains three packages:
  • postgresql-libs-8.4.8-1PGDG.rhel5.x86_64.rpm
  • postgresql-8.4.8-1PGDG.rhel5.x86_64.rpm
  • postgresql-server-8.4.8-1PGDG.rhel5.x86_64.rpm
and it will create the following subdirectories:
  • /var/log/pgsql
  • /var/lib/pgsql
  • /usr/share/pgsql
  • /usr/lib64/pgsql
  • /etc/sysconfig/pgsq
This procedure was tested on a headless CentOS 5.5 enterprise server. Total installation time is about one hour.  This procedure concludes by providing steps for changing the database server password and adding new users.  Good luck!

Procedure

1) Open a terminal on the target server.

2) Log into the root account.

3) Install the PostgreSQL server package and its dependencies using YUM.  Be sure to disable gpg signature checking, in order to avoid annoying warnings:

[root]# yum install postgresql-server --nogpgcheck

4) Initialize the database.  Note that database initialization on RHEL (and thus also CentOS) will be somewhat different than other Linux flavors:

[root]# service postgresql initdb –D /var/lib/pgsql/data

Or, you may need to initialize the database using this approach:

[root]# /etc/init.d/postgresql start

5) Now, start the service:

[root]# /etc/rc.d/init.d/postgresql start

6) The default location on RHEL (and thus also CentOS) systems is /var/lib/pgsql.  However, applications such as bash will expect the location to be /usr/local/pgsql.  This can be fixed via soft symlink:

[root]# ln –s /var/lib/pgsql   /usr/local/pgsql

7) Check to make sure that the postgres account owns the pgsql directory and subdirectories:

[root]# ls –l /var/lib

If not, you will need to change ownership.  When changing ownership, do so recursively.

8) Test the account by logging into it and then performing stop and start commands:

[root]# su – postgres
-bash-3.2$ pg_ctl –stop
-bash-3.2$ pg_ctrl start

9) Stop the PostgreSQL instance so that you can edit configuration settings files:

[root]# service postgresql stop

10) Save a copy of the original configuration file:

[root]# cp /var/lib/pgsql/data/postgresql.conf   /var/lib/pgsql/data/postgresql.conf.ORIGINAL

11) Update the PostgreSQL configuration file to enable it to listen in on the server IP address at the default port:

[root]# vi /var/lib/pgsql/data/postgresql.conf

Uncomment the line “listen_addresses” and set it equal to ‘*’

Uncomment the “port” and leave it set to the default port (5432)

12) Save a copy of the original security access file:

[root]# cp /var/lib/pgsql/data/pg_hba.conf   /var/lib/pgsql/data/pg_hba.conf.ORIGINAL

13) Update the PostgreSQL security access file to enable client access to this PostgreSQL instance from within the subnet:

[root]# vi /var/lib/pgsql/data/pg_hba.conf

Add this line:

host all all 192.168.0.0/24  md5

Additionally, if you want to be able to use a GUI to interact with this postgresql instance over a VPN, you’ll need to identify the IP address that is received by the PostgreSQL instance and add this to the list of hosts allowed to connect.  For example, if your VPN IP address was “10.58.150.8”, then to allow only your “10.0.0.0” IP address to be able to connect you would add the following:

host all all 10.58.150.8/32  md5

14) Startup the postgressql service:

[root]# service postgresql start

15) This completes this PostgreSQL installation procedure.

Troubleshooting the Installation

If you encounter the following error, while trying to perform a YUM install…

Loaded plugins: fastestmirror, rhnplugin
Determining fastest mirrors
Could not retrieve mirrorlist
http://mirrorlist.centos.org/?release=5&arch=x86_64&repo=os error was
[Errno 4] IOError: <urlopen error (-3, 'Temporary failure in name resolution')>
Error: Cannot find a valid baseurl for repo: base"


this likely indicates that YUM on this server was attempting to check an external list using an external repository that your environment is not using.  The solution involves deleting all files in your external repository on the target machine.  For example, your external repository might be:  /etc/yum.repos.d/. 

Delete all the files in this repository and then try again.

Changing the Database Server Password

1) Open a terminal on the target server

2) Login to root

# sudo su - root

3) Super into the postgres account

[root] # su - postgres

4) Open a postgresql shell to the PostgreSQL service database

[root] # psql -d template1 -U postgres

5) Alter the postgres account’s password

[root] # ALTER USER postgres WITH PASSWORD 'postgres_password';

The password change take effect immediately.

6) This concludes this procedure.

Creating a New User

1) Open a terminal

2) Login to root

3) Login to the postgres account

[root] # su - postgres

4) Create new database user for Jive SBS, assigning the password immediately, then responding to the prompts as shown:

-bash-3.2$ createuser -P sbs
Enter password for new role:
Enter it again:
Shall the new role be a superuser? (y/n) n
Shall the new role be allowed to create databases? (y/n) n
Shall the new role be allowed to create more new roles? (y/n) n


The new user is available immediately.

5) This concludes this procedure

Summary

This step-by-step procedure walked you through the installation of a headless PostgreSQL database server onto a CentOS enterprise server.  For additional installation tips and details, consult the references below.  Happy Coding!

References

Tuesday, August 9, 2011

Migrating the Jive SBS Database Step-by-Step

Introduction

This procedure walks you through migration of the Jive SBS 4.5 internal database to a new separate instance of PostgreSQL 8.4.  Use this walkthrough when upgrading from the initial standalone, test Jive SBS instance to a full production instance.  Though this walkthrough focuses on migration of a PostgreSQL database, the method that you will learn here can be applied to any type of Jive SBS database migration.  It will also work for Jive SBS version 4.0.  Performing the migration involves seven steps: 1) Create database dump files, 2) Create databases, 3) Create user, 4) Assign dump file ownership, 5) Import dump files, 6) Update Jive startup file, 7) Restart Jive, and 8) Test.  Only minimal comments and executable statements are presented here.  Note that each step is presented discretely - skip the exits and logouts if continuing from one step to another.  Good Luck!

Procedure

Step 1: Create Database Dump Files

On the Jive SBS machine:

sudo su - root

cd /usr/local/jive/postgres/bin

./pg_dump -U postgres sbs > /pathToYourHomeDirectory/jive_db_sbs.dump

./pg_dump -U postgres sbsanalytics > /pathToYourHomeDirectory/jive_db_sbsanalytics.dump

On the new PostgreSQL machine:

cp /pathToYourHomeDirectory/jive_db_sbs.dump /tmp/jive_db_sbs.dump

cp /pathToYourHomeDirectory/jive_db_sbsanalytics.dump /tmp/jive_db_sbsanalytics.dump

logout

Step 2: Create Databases

On the new PostgreSQL machine:

sudo su - root

su - postgres

createdb -T template0 sbs

createsb -T template0 sbs

exit

logout

Step 3: Create User

On the new PostgreSQL machine:

sudo su - root

su - postgres

psql postgres

CREATE USER sbs WITH PASSWORD 'password';

GRANT ALL PRIVILEGES ON DATABASE sbs TO sbs;

GRANT ALL PRIVILEGES ON DATABASE sbsanalytics TO sbs;

\q

exit

logout

Step 4: Assign Dump File Ownership

On the new PostgreSQL machine:

sudo su - root

chmod 755 /tmp/jive_db_sbs.dump

chown postgres /tmp/jive_db_sbs.dump

chmod 755 /tmp/jive_db_sbsanalytics.dump

chown postgres /tmp/jive_db_sbsanalytics.dump

logout

Step 5: Import Dump Files

On the new PostgreSQL machine:

sudo su - root

su - postgres

psql sbs < /tmp/jive_db_sbs.dump

psql sbsanalytics < /tmp/jive_db_sbsanalytics.dump

exit

logout

Step 6: Update the Jive Startup File

On the Jive SBS machine:

sudo su - root

cd /usr/local/jive/applications/sbs/home

cp ./jive_startup.xml ./jive_startup.xml.ORIGINAL

vi ./jive_startup.xml

Make the following edits:

<serverURL>jdbc:postgresql://[YourPostgresqlDomainName]:5432/sbs</serverURL>

<password>sbsAccountPassword</password>

:x

chmod 600 ./jive_startup.xml

logout

Step 7: Restart the Jive SBS

sudo su - root

service jive-application - restart

Step 8: Test

Open a browser and point it to your Jive SBS instance.

Summary

Congratulations! In this step-by-step walkthrough, you have been shown how to perform a migration of the Jive SBS 4.5 internal backend to a new and separate instance of PostgreSQL 8.4.  The method presented here has been successfully tested on both versions 4.0 and 4.5 of Jive SBS.  The method presented here focuses on PostgreSQL migration but may be applied to any other type of database migration.

Troubleshooting

If you attempt to perform an import of the dump files, but experience a "Permission Denied" error, perform the following checks:
  • Verify that the account being used to perform the import (most likely the "postgres" account) has permission to navigate the directory path to the location of the dump files.
  • Verify that the account used to perform the import (most likely the "postgres" account) has permission to read the dump files.
If, after performing this walkthrough, you test the Jive SBS instance and experience an HTTP Status 404 error, perform the following checks:
  1. Verify that the password stated in the jive_startup.xml file is the same as that used to create the sbs user.
  2. Verify the PostgreSQL server URL and port are correct.
  3. Verify that the sbs user has been granted ALL PRIVILEGES to both the sbs and sbsanalytics databases.
  4. Verify that the PostgreSQL postgresql.conf file has been configured to allow it to listen to connection attempts ("listen_addresses").
  5. Verify that the port stated in the PostgreSQL postgresql.conf file is the same as that indicated in the jive_startup.xml file.
  6. Verify that the PostgreSQL pg_hba.conf file has been configured to allow connections from the Jive SBS IP address.
  7. Check the PostgreSQL log files located here: .../pgsql/data/pg_log/.
  8. Check the Jive SBS logs located here: .../jive/var/logs/.
References
Notes
  • Jive SBS 4.5 uses PostgreSQL 8.1 as its internal database.
  • This walkthrough was performed on headless 64-bit CentOS 5.5 servers.
  • This walkthrough was performed using 64-bit Jive SBS 4.5 and 64-bit PostgreSQL.

Sunday, March 20, 2011

Installing Jive on CentOS Step-by-Step

Introduction

This procedure walks you through step-by-step development installation of Jive 4.5, 32-bit, onto CentOS 5.5 running as a guest operating system within VMware Workstation 7.1.3.  It does not cover configuration of Jive post-install.  Installation of Jive in this procedure will occur in two distinct steps: 1) performing a custom installation of CentOS 5.5; and 2) performing a default installation of Jive SBS; additionally, this walkthrough also examines uninstallation in step 3.  For additional detail, consult the CentOS and Jive websites [1, 2].  This installation procedure follows the steps discussed in the Jive 4.5 documentation [3]. Good Luck!

Procedure

Step 1: Custom Installation of CentOS 5.5

This is covered in Installing CentOS Step-by-Step.  Work through this procedure and then return here.  Working through this CentOS installation procedure leaves you with a CentOS instance having sufficient root partition space able to accomodate a Jive installation.

Step 2: Installing Jive

Register and obtain a trial version of Jive.  Copy the rpm file to your CentOS instance.  Assuming that you copied it to your CentOS desktop enter the following commands:
# cd Desktop
# cp -p jive_sbs_employee-4.5.5.1.RHEL-5.i586.rpm /usr/local/src
# cd /usr/local/src
These series of commands copy the rpm package to a standard storage area.  Now, run the command that launches the installation:
# rpm -ihv jive_sbs_employee-4.5.5.1.RHEL-5.i586.rpm
If you performed the CentOS installation procedure discussed above, you may experience a configuration error:


The error description informs you what you need to do to resolve it.  The first task is to edit the limits.conf file.  Enter the following command:
# gedit /etc/security/limits.conf
gedit opens to the file:


Save a copy of this file as limits.conf.original.  Then close gedit.  This saves the original in case you need to restore it.  Then rerun the command to open gedit to the same file again.  Scroll down to just after the <domain> <type> headers.  Then enter the following two lines just as stated in the error message:
*    soft    nofile  8192
*    hard    nofile  65535
Use the Tab and space keys to align things more nicely.  After making these edits, you should see something like the following (highlighted):


Save the file, and then exit.  Now, edit the second file.  Enter the following command:
# gedit /etc/pam.d/login
This opens the gedit text editor:


As before save a copy of this file as login.original.  Then close gedit.  Rerun the same command again and then add the following lines at the end of this file:
# pam_limits.so added for Jive
session    required     /lib/security/pam_limits.so
Use the space key as needed to make things align as desired.  After making these edits, you should have something like that shown below (highlighted):


Save and exit gedit.  Then logout and log back in to your CentOS instance.  Open a terminal, and then enter the following commands:
# cd /usr/local/src
# rpm -ihv jive_sbs_employee-4.5.5.1.RHEL-5.i586.rpm
The installation will now proceed normally.


You may see warnings regarding RAM and CPU resources:


These can be ignored, for this walkthrough, given that we are not installing a production version of Jive but a development version.  Once the installation is completed, you will see the following:


Now to launch Jive.  First find out what the IP address is.  Enter the following command:
# ifconfig
This will return IP configuration information for your CentOS instance:


In this case the IP address is 192.168.0.12.  Now open a browser and point it to this IP address.  Your browser will open to the first page of Jive configuration.


This completes Jive installation. Now, let's walkthrough unistallation.

Step 3: Uninstalling Jive

Jive SBS can be uninstalled using either the Add/Remove Software tool GUI, or using RPM commands.  Whichever tool is used, some manual cleanup will still be needed.  Let's first walkthrough unstallation using the GUI.

On the Gnome panel, point to Applications, and then select Add/Remove Software.  Select the Search tab, enter "Jive, and then click Search.


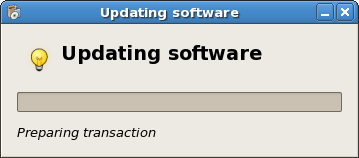
Uncheck the Jive item, and then click Apply.  Uninstallation proceeds.


Then uninstallation completes.


Just as a check, go back to the Add/Remove Software tool, and perform another search on "Jive."  Nothing will appear.


Now, after performing an uninstall this way, there is still some minor manual cleanup that needs to be performed.  However, before this is looked at, let's first look at performing an uninstallation using RPM commands.

Open a terminal.  At the prompt, enter the following command:
rpm -e jive_sbs
The uninstallation routine commences.


Whichever method is used, there is still a minor post uninstallation task that should be performed.  If you don't perform this step, and you perform a subsequent re-installation, you will see some warnings during the installation:


To avoid these issues, do the following.  Open a terminal, and then enter the following command:
rm -rf /usr/local/jive
This removes the Jive rpm destination directory.

Summary

That's all there is to Jive installation.  Congratulations and Happy Computing!

References
  1. CentOS
  2. Jive SBS
  3. Jive Documentation: Installing the Linux Package
Notes