Introduction
This posting walks through the process of enabling document conversion from Word to HTML using Word Automation Services. The procedure developed for this posting was performed on the following farm topology: two-tier SharePoint 2010 farm, hosted on Windows Server 2008 R2 and employing SQL Server 2008 R2 for the database tier. Domain controller, DNS, SQL Server instances collocated on same server. NTLM authentication. All servers hosted within VMware Workstation 7.X. All references used to guide development of this posting are provided in the References section.
Step 1: Configure
This posting has presented the steps for how to enable document conversion from Word to HTML in SharePoint 2010. For additional detail on the topics discussed in this posting, see the references below.
References
| BI Services Series |
| How to implement SharePoint 2010 Access Services |
| How to setup Secure Store and BCS to access LOB data |
| How to enable document conversion from Word to HTML in SharePoint 2010 |
| How to set up Excel Services to use Secure Store Services and an unattended service account |
Step 1: Configure
- Launch Central Administration under an account that is a member of the Farm Administrators SharePoint group.
- Go: Central Administration > Service Applications > Manage services on server. The browser is navigated to the Services on Server page:

- Look for the following two services:
- Document Conversions Launcher Service.
- Document Conversions Load Balancer Service.
- Click the Document Conversions Load Balancer Service first. The browser is navigated to the Load Balancer Service Settings page:

- Configure as desired, and then click OK. The browser is navigated back to the Services on Server page. If this service is not started, start it. The Load Balancer service must be configured and started before configuring and starting the Launcher service, as the Launcher service depends upon the Load Balancer settings.
- Click the Document Conversions Launcher Service second. The browser is navigated to the Launcher Service Settings page:

- Configure as desired. Note that the available servers listed in the Load Balancer server dropdown depends on properly configuring and starting the Load Balancer Service.
- Click OK. The browser is navigated back to the Services on Server page.
- Start the Document Conversions Launcher Service. Both services will now appear as stated in the Services on Server page:

- This completes Step 1.


- Go: Central Administration > General Application Settings > External Service Connections > Configure document conversions. The browser is navigated to the Configure Document Conversions page:

- In the Web Application section, select the web application from the dropdown list.
- In the Enable Document Conversions section, select Yes.
- In the Load Balancer Server section, select the Load Balance Server.
- In the Conversion Schedule section, select the desired schedule. At this point, the page looks like this:

- In the Converter Settings section, click Customize From Word Document to Web Page (docx to html). The browser is navigated to the Document Converter Settings page:.
- In the Converter Settings section, ensure that Make this document converter... has been checked, and edit other settings as desired:

- Click OK. The browser is navigated back to the Configure Document Conversions page.
- Exit Central Administration.
- This completes Step 2.


- Connect to the web application identified in step 2.2, above.
- Go: Site Actions > Site Settings > Site Collection Administration > Site collection features. The browser is navigated to the Features page.
- Scroll down to near the bottom, where you'll find the SharePoint Server Publishing Infrastructure feature:By default, this feature is not activated.

- Click the Activate button next to this feature. After a few moments, the button will change to state Deactivate and a blue status message will appear next to it, indicating Activated.
- Now go: Site Actions > Site Settings > Site Actions > Manage site features. The browser is navigated to the site settings Features page.
- Scroll down until you find the SharePoint Server Publishing feature:

- Click the Activate button next to this feature. After a few moments, the button will change to state Deactivate and a blue status message will appear next to it, indicating Activated.
- This completes Step 3.


- Upload a Word document to a document library in some web application site. It doesn't matter which, as Word Automation services are set for the Web Application level and not at the site collection level. For example, the Word document here was loaded to the default Shared Documents folder:

- Open the file's context menu, point to Convert Document, and then point to From Word Document to Web Page:

- Click this menu option. The browser is then navigated to the Create Page From Document page.
- In the Page Title and Description section, enter a Title and a description. As the title is entered, it will be used to create an initial URL Name. This name can be changed independently of the Title. For this example, an underscore was used in place of a blank to avoid HTML encoding:

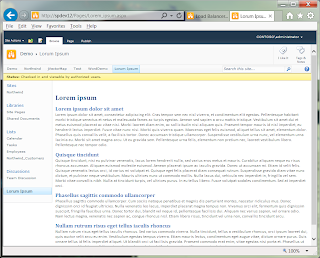
- Click Create. A busy indicator will appear momentarily. After a few moments, the browser is navigated to the new page, displaying the word document in HTML format:
- This page was created by default in the Pages library, which is created when you activate the Publishing feature:

- This completes testing.


- To remove the newly converted Word document's link from Global and Current navigation, go: Site Actions > Site Settings > Look and Feel > Navigation. The browser is navigated to the Navigation Settings page.
- In the Global Navigation and Current Navigation sections, uncheck the Show pages checkbox setting:

- Click OK. The browser is navigated back to the Site Settings page, with the new page links no longer appearing:

- This completes this optional step.


This posting has presented the steps for how to enable document conversion from Word to HTML in SharePoint 2010. For additional detail on the topics discussed in this posting, see the references below.
References
- Build a SharePoint Server 2010 Two-Tier Dev Environment on Windows 2008 R2
- Configure Document Conversions Load Balancer and Launcher Services (SharePoint Server 2010)
- Enable document converters for a Web application
- Enable the Document Conversion Service
- Converting Word Documents to PDF using SharePoint Server 2010 and Word Services
- Word Automation Services Troubleshooting (SharePoint Server 2010)
- Convert Document option does not appear on the Word document's context menu:
- Go: Central Administration > General Application Settings > External Service Connections > Configure document conversions. The Configure Document Conversion page is displayed.
- Verify the following settings:
- Enable Document Conversions: Yes.
- Load Balancer Server: [set to a valid load server and not to None]
No comments:
Post a Comment