Introduction
This posting walks through the process of configuring auditing for a collaboration site collection. It engages the scenario where: as the farm administrator, you want to push down administration of collaboration sites but you still want to monitor critical activities, such as permission change and content deletions.
Procedure
- Navigate to the collaboration site.
- Go to: Settings > Site Settings. Look for Site collection audit settings.

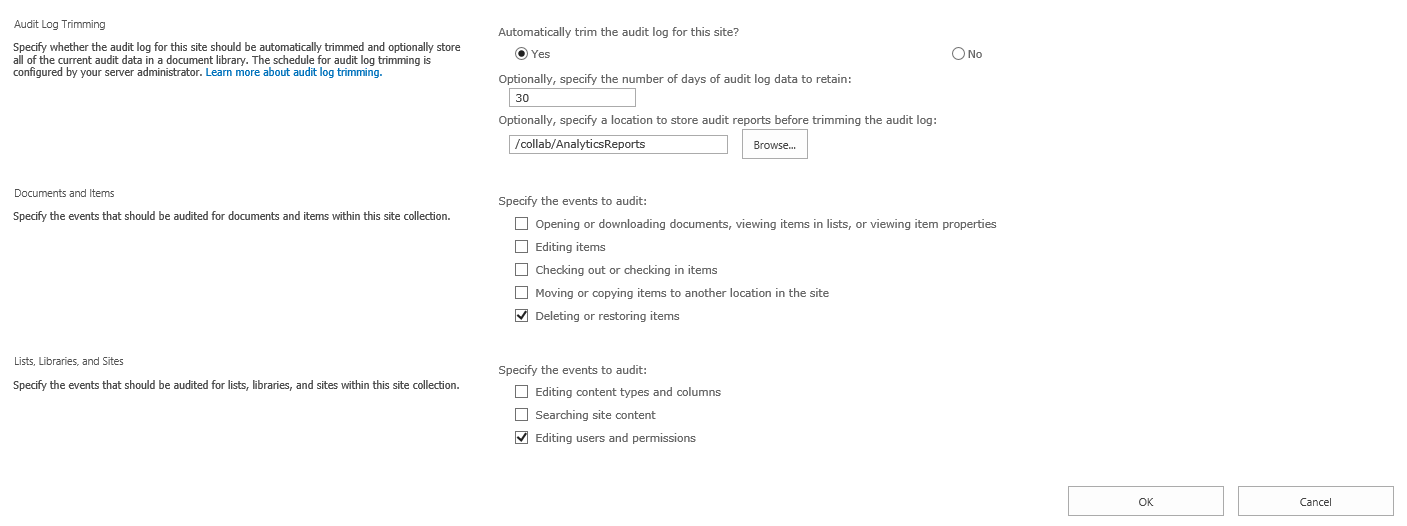
- Click this link. Look for Automatically trim the audit log for this site?

- Select Yes.
- Enter 30.
Note: you will not actually obtain a report until this amount of days have passed. Therefore, if you want to obtain these report files on a more timely basis, set this to a smaller number of days.
- Click the Browse... button. A popup will appear.
- Select the document library where you want the audit log stored to. For this example, the Customized Reports document library was selected.

- Click OK. The relative URL to this library is inserted. Note that the popup displays Customized Reports, but that the URL to this library seems to call it AnalyticReports.
- Enable the Deleting or restoring items and Editing users and permissions checkboxes. The audit data generated by these two events will be sufficient for me as the administrator to track significant activities involving the collaboration site.
- Click OK.
- Go to: Settings > Site Settings. Look for Audit Log Reports. It should appear in the Site Collection Administration group, just under the Site collection audit settings link.
- Microsoft Office Articles
- If you don't see the Audit Log Reports link, it may be that the site collection Reporting feature has not been activated. Activate that feature, and the link should appear directly.
- Also, be sure that you have enabled the Audit log enabled setting in the Secure Store Service Properties.
No comments:
Post a Comment