Introduction
This posting presents a detailed, step-by-step walkthrough for setting up user profile synchronization and MySites in a SharePoint Server 2010 farm. It is based upon the small two-tier SharePoint Server 2010 farm created in a previous posting. To prepare for this posting, Active Directory was populated with the Northwind Traders list of employees/users (9). A new organizational unit was added to Active Directory, SharePoint Users, and the Northwind Traders users were added to this OU. The synchronization that will be setup here is read only (from Active Directory to SharePoint Server). Setting up synchronization and My Sites involves the following steps:
Step 1: Provision accounts
This posting has presented a step-by-step walkthrough for setting up user profile synchronization and My Sites. The synchronization here is read only (from Active Directory to SharePoint Server). Additional work remains to add/remove/revise the fields to be imported from AD.
References
This posting presents a detailed, step-by-step walkthrough for setting up user profile synchronization and MySites in a SharePoint Server 2010 farm. It is based upon the small two-tier SharePoint Server 2010 farm created in a previous posting. To prepare for this posting, Active Directory was populated with the Northwind Traders list of employees/users (9). A new organizational unit was added to Active Directory, SharePoint Users, and the Northwind Traders users were added to this OU. The synchronization that will be setup here is read only (from Active Directory to SharePoint Server). Setting up synchronization and My Sites involves the following steps:
- Provisioning accounts
- Creating a new web application
- Creating a new site collection
- Provisioning a new profile service application
- Configuring a new profile service connection
- Testing
Step 1: Provision accounts
- Provision existing SharePoint farm administration account (sp_admin):
- Logon to the SharePoint Server host machine.
- In Server Manager, go to: Configuration > Local Users and Groups > Groups.
- Double-click the Administrators group

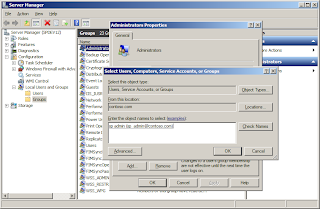
- On the Administrators Properties dialog, click Add.
- In the Select Users, Computers, Service Accounts, or Groups dialog, enter the SharePoint farm administration account.
- Click Check Names:
- Click OK.
- On the Administrators Properties dialog, click OK.
- Close Server Manager.
- Go: Start > Administrative Tools > Local Security Policy.
- On the Local Security Policy dialog navigation pane at left, go to: Security Settings > Local Policies > User Rights Assignment.
- In the list pane at right, look for Allow log on locally.

- Double-click Allow log on locally.
- On the Allow log on locally Properties dialog, click Add User or Group.
- In the Select Users, Computers, Service Accounts, or Groups dialog, enter the SharePoint farm administration account sp_admin.
- The SharePoint farm administration account must have local administrator privileges during this process - but only during this process. Once you have successfully created profile synchronization and MySites, you can safely remove this local permission.
- Click Check Names, and then click OK.

- On the Allow log on locally Properties dialog, click OK.
- Close the Local Security Policy applet.
- Logout of the SharePoint Server host machine.
- This concludes provisioning of the SharePoint farm administration account.
- Create new SharePoint profile synchronization account:
- Logon to the domain controller host.
- Go: Start > Administrative Tools > Active Directory Users and Computers.
- On the Active Directory Users and Computers dialog navigation pane at left, go to: Active Directory Users and Computers > [your domain] > Users.
- From the Action menu, point to New and then select User.
- Launch the Active Directory Users and Computers applet.
- Enter information and name the account sp_sync.
- Click Next, and then enter password.
- Click Next, and then click Finish.
- Provision new SharePoint profile synchronization account:
- On the navigation pane at left, select the domain (contoso.com).
- From the Action menu, select Delegate Control.

- Click Next.
- On the Users or Groups page of the Delegation of Control Wizard, click Add.
- In the Select Users, Computers, or Groups dialog, enter the SharePoint farm administration account.
- Click Check Names, and then click OK.

- On the Users or Groups page of the Delegation of Control Wizard, click Next.
- On the Tasks to Delegate page of the Delegation of Control Wizard, select the Create a custom task to delegate option, and then click Next.
- On the Active Directory Object Type page of the Delegation of Control Wizard, click Next.
- On the Permissions page of the Delegation of Control Wizard, enable General.
- Scroll the Permissions list for the Replicating Directory Changes item, and then enable this item

- Click Next, and then click Finish.
- Close Active Directory Users and Computers.
- Logout of the domain controller host (spdev11).
- Logon to the SharePoint Server host (spdev12).
- Launch Central Administration.
- In the Quick Launch navigation pane at left, click Security.
- At right, in the General Security group of links, look for Configure managed accounts:

- Click Configure managed accounts.
- On the Managed Accounts page, click Register Managed Account.

- On the Register Managed Account page, in the Service account credentials section, enter the new account information (e.g., contoso\sp_sync).
- Click OK.
- In Central Administration, return to the main page.
- This concludes provisioning of the SharePoint user profile synchronization account.


- On the Central Administration Quick Launch pane at left, click Application Management.
- On the Application Management page, in the Web Applications group of links, click Manage web applications.
- On the Web Applications ribbon, look for the New button:

- Click the New button.
- Provision the new web application as follows:
- Authentication: classic.
- IIS Web Site: Create a new IIS web site: MySites (4200).
- Port: 4200.
- Application Pool: Create new application pool: MySites (4200) App Pool.
- Security account: contoso\sp_sync.
- Database Server: spdev11.
- Database Name: WSS_Content_MySites.

- Database Authentication: Windows authentication.
- Service Application Connections:
- User Profile
- Manage Metadata
- Search
- Web Analytics
- Usage and Health data collection

- Click OK.
- In Central Administration, navigate back to the main page.
- This concludes creating the new MySites web application.


- In Central Administration, on the Quick Launch navigation panel at left, click Application Management.

- On the Application Management page, in the Site Collections group, click Create site collections.
- Provision the site collection as follows:
- From the Web Application dropdown, select the web application created in the previous step.
- Title: enter a title.
- In Select a template, click Enterprise, and then select My Site Host.

- For the Primary Site Collection Administrator: enter the domain administrator account.
- For the Secondary Site Collection Administrator: enter your domain admin account.
- Click OK.
- Click OK again.
- In Central Administration, navigate back to the main page.
- This concludes creating the new site collection.


- In Central Administration, on the Quick Launch navigation panel at left, click Application Management.
- On the Application Management page, in the Service Applications group, click Manage service applications:

- On the Service Applications ribbon, click the New button, and then select User Profile Service Application from the dropdown:

- On the Create New User profile Service Application dialog, configure as follows (only non-default values shown here):
- Name: User Profile Service App I.
- Application Pool: Create new application pool.
- Application pool name: User Profile Service App I.
- Select a security account for this application pool: Configurable: Contoso\sp_sync

- My Site Host URL: [site collection url].
- Site Naming Format: User name (do not resolve conflicts).
- Click OK.
- On the Service Applications page, scroll down to see the newly created User Profile Service App I:

- Open a command prompt.
- Execute the following command:
- iisreset /noforce:

- Once completed, close the command window.
- Go: Start > Administrative Tools > Services.
- Verify that the two Forefront Identity Manager services have been added and are started:

- This concludes provisioning a new user profile service application.


- In Central Administration, on the Quick Launch navigation panel at left, click Application Management.
- On the Application Management page, in the Service Applications group, click Manage service applications.
- On the Service Applications page, scroll down the list of service applications and look for User Profile Service App I:

- Select this service (don't click on its name, just the row).
- On the Service Applications ribbon, click Manage.
- On the User Profile Service App I page, look for the Synchronization group of links, and then click Configure Synchronization Connections.
- On the Synchronization Connections page, click Create New Connection.
- On the Add new synchronization connection page, configure as follows (only non-default values shown here):
- Connection Name: User Profile Service App I Sync Connection.
- Forest name: contoso.com.
- Account name: contoso\sp_sync.
- Password: [password]

- Scroll down to the Containers section.
- Click Populate Containers.
- Select the users or organizational unit desired

- Click OK..
- In Central Administration, on the Quick Launch navigation panel at left, click Application Management.
- On the Application Management page, in the Service Applications group, click Manage service applications.
- On the Service Applications page, scroll down the list of service applications and look for User Profile Service App I

- Click this link.
- On the User Profile Service App I page, look for the Synchronization group of links, and then click Start Profile Synchronization

- On the Start Profile Synchronization page, select Start Full Synchronization, and then click OK.
- Wait. This will take several minutes or more. Once completed, proceed to the next step.
- Logout of Central Administration and close all browser instances.


- Open a browser and connect to the site.
- Sign in as: Andrew.Fuller (Northwind Traders account).
- After signing in, look for the user name in the upper right-hand corner, and click it. A dropdown menu will appear:

- Wait.
- At the logon prompt, enter this user's username and password.
- Wait. On first time connection, the new site must be created and provisioned. After a minute or so, the user's personal site will be displayed:

- Close the web page.


This posting has presented a step-by-step walkthrough for setting up user profile synchronization and My Sites. The synchronization here is read only (from Active Directory to SharePoint Server). Additional work remains to add/remove/revise the fields to be imported from AD.
References
- Als Tech Tips:
- TechNet Library:
- Plan for profile synchronization (SharePoint Server 2010)
- Directory Domain Services permissions for profile synchronization (SharePoint Server 2010)
- Best practices for My Sites (SharePoint Server 2010)
- Plan for My Sites (SharePoint Server 2010)
- Configure profile synchronization (SharePoint Server 2010)
- IIS Reset Activity
- ADSI Edit (adsiedit.msc)
- Microsoft Download Center:
- User Blogs:
- Harbar: Rational Guide to implementing SharePoint Server 2010 User Profile Synchronization
- Where to find the FIM Client (miisclient.exe)
- MSDN Blogs:
- Step 2: this posting follows best practices by isolating user mysites in a separate web application. OOTB, a User Profile Service Application service is already entered into the list of services. However, this one is configured to create My Sites in a subsite off the main site.
- Step 5: the synchronization presented here is one-way: user profile information in Active Directory is harvested and then ingested into SharePoint Server; there is no write-back of this information to Active Directory after a user changes it.
- Synchronization Service Manager: tool useful for troubleshooting the SharePoint User Profile Service Application. You'll find it at this folder location:
\Program Files\Microsoft Office Servers\15.0\Synchronization Service\UIShell
Look for miisclient.exe. It enables you to view the real-time status of UPA processes, among many other things. I don't use it to manage FIM; just to view status information. For example, I have used to troubleshoot a UPA that failed to start. As I tried different troubleshooting steps, I monitored Synchronization Service Manager, watching in real-time to see how far UPA started, before stopping. It also provides helpful other information, such as confirmation of the Domain Controller that it is connecting to. If you configured UPA using Auto Detect for DC, you can now determine exactly which DC it is connecting to. You can also get confirmation of the service account that is running UPA (eg, the farm service account), and the number.
No comments:
Post a Comment