Introduction
This posting walks through the process of configuring SSL for SharePoint 2013 for development or testing purposes using the SelfSSL tool available with the IIS6 Resource Kit. It isn't necessary to build the web application from the start as SSL: you can implement this procedure for a non-SSL web application to which you want to also implement SSL. This procedure assumes that: a non-SSL web application has been created and implements NTLM, claims-based authentication; and a root site collection has been created. It assumes a small, two-tier topology, consisting of a SQL Server database on one server and the SharePoint application on the other. Hyper V 2012 is the infrastructure platform, employing Windows Server 2012 as the server platform.
Procedure
- Edit the HOSTS file, on the SharePoint server to include the new domain name.
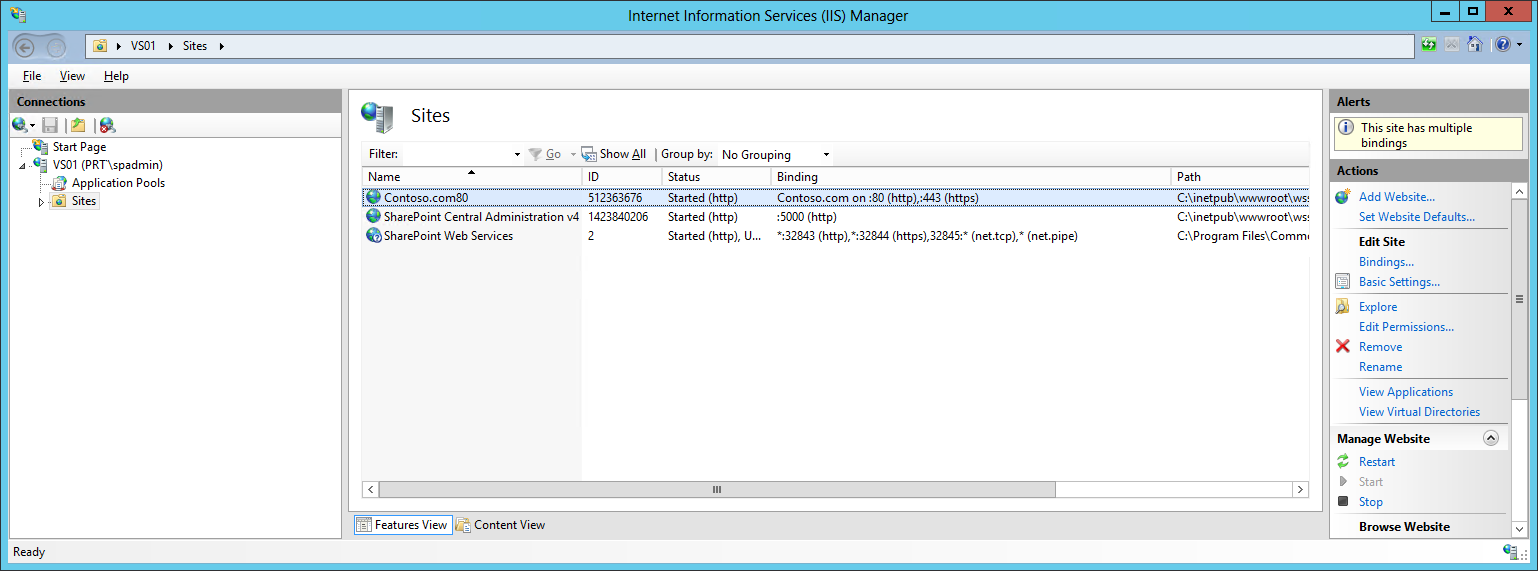
- Identify the web application name for which you want to implement SSL. For this posting, the web application is Contoso.com80. This is the name seen in Central Administration > Application Management > Web Applications > Manage web applications.
- Download and install the IIS 6.0 Resource Kit Tools package. Install this as Administrator (right-click). Installing this will add a number of new options:

- Look for the SelfSSL option, and then right-click this to open it in elevated mode:This needs to be opened as Administrator in order for SelfSSL to be able to successfully create the certificate and store it in the Certificate Store.

- Change the shell directory to the location of the SelfSSL.exe tool, at C:\Program Files (x86)\IIS Resources\SelfSSL:

- Launch a new elevated command shell.
- Execute the following:
%systemroot%\system32\inetsrv\APPCMD list site "contoso.com80"
This returns the web application ID in IIS. You need the web application ID in order to successfully create the SSL certificate for this web application. This returns an ID of 512363676.
- Back in the SelfSSL command shell, execute the following:
selfssl.exe /s:512363676 /t /v:7 /n:cn=contoso.com
This creates the new certificate,associating it with the web application, and storing it in the Personal certificate store: Double-clicking on the entry in the Personal certificate store, you can see the certificate:
 .
.
- Launch IIS, and then select the Sites node to view the list of sites. Looking in the Binding column, note that SelfSSL has already added an SSL binding for the Contoso.com80 web application:.

- In IIS, double-click on the target site. This opens the Site Bindings dialog for the site:Though SelfSSL added the new binding, it did not configure it. For example, as you can see, it did not configure the Host Name for the binding. Nor did it select the certificate for this binding. This you need to do yourself.

- On the Site Bindings dialog, click the Edit button. This opens the Edit Site Bindings dialog.
- In this dialog, enter the Host name Contoso.com, and then select the contoso.com certificate:

- Click OK, and then click Close.
- On the SharePoint server, open a browser, and then connect to:
https://contoso.com
The browser should connect to the domain name without presenting any certificate warning:If you attempt to connect to this site from another server in the domain (with suitable modification of its HOSTS file), you will experience the certificate warning.
- This completes this procedure.


References
- Internet Information Services (IIS) 6.0 Resource Kit Tools
- Setting up SSL with a SelfSSL certificate on Windows Server 2003
- How to find IIS7 SiteID using site name on Windows 2008 using appcmd or other util?
- Help needed! SSL certificate replaced, but site delivers old one still?!
- Do It Yourself with SelfSSL
- Setup SSL in SharePoint 2013 using commercial certificates
Notes
- If you previously deployed the web application using a self-signed certificate created using the IIS8 tool, and you then work through this procedure to replace it, you may find that the old certificate continues to be presented to client browsers. To resolve this, you need to both reset IIS and restart the HTTP web service. Open an elevated command shell, and then execute the following commands in this order
- iisreset /stop
- net stop http
- net start http
- iisreset /start
No comments:
Post a Comment