Introduction
This procedure walks you through step-by-step installation of (32-bit) PostgreSQL 9.0.3 onto (32-bit) Microsoft Windows Server 2003 SP2 running within Microsoft Virtual PC 6.0.192. Links to all of the websites and key topics presented in this procedure are provided in the References section, below.
Procedure
- Download the PostgreSQL Plus Standard Server version 9.0.
- Doubleclick the installer executable. The first page of the Setup wizard appears.
- Click Next. The Installation Directory page appears.
- Enter a program files directory or accept the default, and then click Next. The Data Directory page appears.
- Enter a data files directory or accept the default, and then click Next. The Password page appears.
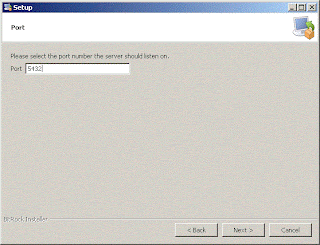
- Enter a superuser password, and then click Next. The Port page appears.
- Enter a port or accept the default, and then click Next. The Advanced Options page appears.
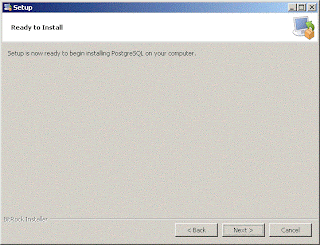
- Select a locale or accept the default, and then click Next. The Ready to Install page appears.
- Click Next. The Installing progress page appears. Installation takes approximately 5-7 minutes. After installation is completed, the Completing the PostGreSQL Setup Wizard page appears.
- Leave the Stack Builder checkbox unchecked, and then click Finish. This completes the installation. Now let's test the installation.
- Open a command console.
NOTE: In the commands that follow, the path to the PostgreSQL bin directory was added to the Windows PATH environment variable. If you don't do this for your instance, you'll need to execute these commands from within the PostgreSQL bin directory.
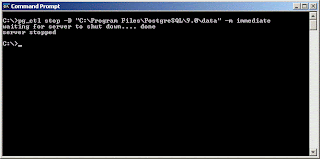
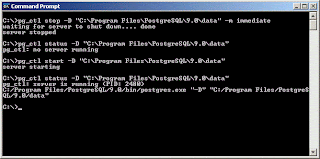
- At the prompt, enter the following command to stop the server:
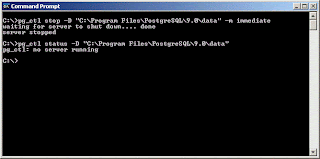
pg_ctl status -D "C:\Program Files\PostgreSQL\9.0\data"
A server status message will appear in the console. - At the prompt, enter the following command to check the status of the server:
pg_ctl stop -D "C:\Program Files\PostgreSQL\9.0\data" -m immediate
A new server status message will appear in the console. - At the prompt, enter the following command to start the server:
pg_ctl status -D "C:\Program Files\PostgreSQL\9.0\data"
A server status message will appear in the console. - At the prompt, enter the following command to check the server status one more time:
pg_ctl stop -D "C:\Program Files\PostgreSQL\9.0\data" -m immediate
A new server status message will appear in the console. - Now let's check the operation of the PostgreSQL GUI.
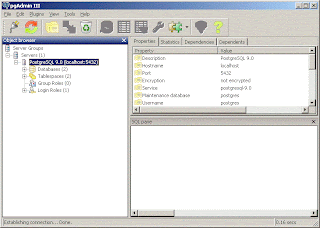
- From the PostgreSQL 9.0 program group, select pgAdmin III. The pgAdmin III application dialog appears.
- Right-click on the PostgreSQL 9.0 (localhost: 5432), and then select Connect from the pop-up menu. The Connect to Server dialog appears.
- Enter the SU password, and then click OK. The dialog closes, and you are returned to the main application dialog. Note that now you'll see a number of objects appearing below the PostgreSQL 9.0 (localhost: 5432) item.
- Congratulations! You've successfully installed PostgreSQL 9.0 to Windows and tested its successfull installation.
- EnterpriseDB home page
- EnterpriseDB Documentation: pg_ctl
- PostgreSQL Wiki
- PostgreSQL Sample Database
- Microsoft Virtual PC
- Total security in a PostgreSQL database
- A collection of sample databases for PostgreSQL - PgFoundry
- Installed to virtual Microsoft Windows Server 2003 R2 within Microsoft Virtual PC 6.0.192.0.
- To simplify entering PostgreSQL commands without having to continually navigate to the bin directory, consider adding the path to the bin directory to the Windows PATH environment variable.
- A sample database is not included in this installation. However a scripted sample DB is available at the PostGreSQL Sample Database link in the References section above.







No comments:
Post a Comment