Introduction
This posting walks through the steps necessary for installing a named instance of SQL Server 2008 R2 to an existing default instance. Total time to completion is approximately 25 minutes. This procedure was performed on a virtualized Windows Server 2008 R2 SP1, hosting a default instance of SQL Server 2008 R2 SP2. The development network is hosted on VMware Workstation 7.X and has Internet connectivity. Take note of step 11, below: this is the critical step for installing a named instance.
Procedure
This posting presented a step-by-step procedure for installing a named instance of SQL Server 2008 R2 to an existing default instance. For additional detail on the topics presented here, please consult the references below.
References
Notes
This posting walks through the steps necessary for installing a named instance of SQL Server 2008 R2 to an existing default instance. Total time to completion is approximately 25 minutes. This procedure was performed on a virtualized Windows Server 2008 R2 SP1, hosting a default instance of SQL Server 2008 R2 SP2. The development network is hosted on VMware Workstation 7.X and has Internet connectivity. Take note of step 11, below: this is the critical step for installing a named instance.
Procedure
- Load and launch the SQL Server 2008 R2 installation. SQL Server Installation Center dialog appears:
- Click New installation or add features to an existing installation. The first page of the SQL Server 2008 R2 Setup wizard appears:
- Click Install. Setup performs a system check:
- Click Next. The Installation Type page appears:
- Select New installation or add shared features, and then click Next. The Product Key page appears:
- Enter the product key or select evaluation, and then click Next. The License Terms page appears:
- Check the I accept the license terms, and then click Next. The Setup Role page appears:
- Select All Features With Defaults, and then click Next. The Feature Selection page appears:
- Check/uncheck desired features, and then click Next. Setup runs installation rules and then presents the results:
- Click Next. The Instance Configuration page appears:
- Select Named instance, and then enter the Instance ID (i.e., name) for the new instance. For this posting, the named instance is called SQL2:
- Click Next. The Disk Space Requirements page appears:
- Click Next. The Server Configuration page appears:
- Configure accounts as needed. For this posting, the System account was used:
- Click Next. The Database Engine Configuration page appears:
- Click Add Current User. This will most likely already be added.
- Click the FILESTREAM tab and configure this for possible dev exploration in the future:
- Check Enable FILESTREAM for Transact-SQL access.
- Check Enable FILESTREAM for file I/O streaming access.
- Click Next. The Analysis Services Configuration page appears:
- Click Add Current User, to add the current account:
- Click Next. The Reporting Services Configuration page appears:
- Select Install, but do not configure the report server, and then click Next. The Error Reporting page appears:
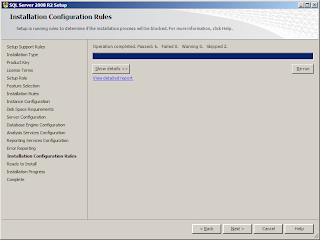
- Click Next. The Installation Configuration Rules page appears:
- Click Next again. The Ready to Install page appears:
- Click Install. Installation takes approximately 20 minutes.
- Click Close.
- This completes installation of a new named instance of SQL Server 2008 R2 to an existing default instance on the same server.
- Optional: Verify successful installation and configuration:
- Launch SQL Server 2008 R2 Management Studio.
- Connect to the new instance. For this posting, the named instance server name is: SPDEV11\SQL2.
- Click Connect. The Management Studio will appear and is connected to the named instance:
- This concludes this procedure.
This posting presented a step-by-step procedure for installing a named instance of SQL Server 2008 R2 to an existing default instance. For additional detail on the topics presented here, please consult the references below.
References
Notes
- This walkthrough was performed in preparation for setting up a new SharePoint Server 2013 instance on the same network as an existing 2010 instance in preparation for migration testing. The 2013 instance will employ the named instance.


No comments:
Post a Comment